The kitchen timer is a tool that lets you time cooking and baking tasks to perfection. It’s used to cook, bake, or grill food while it is resting from cooking in order to prevent burning or overcooking the food. One of the most common uses of this device is when boiling vegetables or eggs. This timer can also be found in various kitchen appliances, such as crock-pots and ovens.
Before starting with our in-depth guide on kitchen timers, here are our top picks:
The Best Kitchen Timers In The Market: Our Top Picks!


How Useful are Kitchen Timers in Cooking?
A kitchen timer is a versatile, convenient piece of equipment for many purposes. If you’re a professional chef or an avid cook, then it’s probably one of the most important tools in your culinary kit.
It’s very useful whether you’re cooking something new or preparing a favorite dish. You’ll find yourself using your kitchen timer to time all sorts of things, from baking bread to boiling potatoes, and even to determining when certain parts of a dish are ready at different times. Aside from helping you with your cooking skills, this timer can also help you save money on electricity bills by reminding you to turn off the ovens or stove when cooking is done without having to stay in one place.
Types of Kitchen Timers
There are a variety of kitchen timers available on the market today. Here is a rundown of the most popular types:
Clip-on Kitchen Timer: This type of kitchen timer attaches to the side or bottom of your pot or oven and creates a visual countdown so you can keep track of your cooking time. The timer typically has an alarm that will ring when it’s time for you to prepare something else in order to avoid overcooking your food. Most clip-on timers are waterproof and designed with a base that allows for easy placement on any large or small stovetop or oven. An exception would be the timer that comes with an oven broiler. This timer is designed to be placed on the upper rack of the broiler for easy monitoring.
Clip-on Timers are usually battery powered, and it’s a good idea to put on an extra set of batteries when you purchase the product. Most clip-on timers have two or three alarms that will signal your completion of cooking. The timers usually have an hourly alarm as well as a time count alarm so that you can check how much time is left in your cooking before you’re forced to stop. Most clip-on timers are battery operated, and they also come with their own separate batteries which will require replacement eventually.
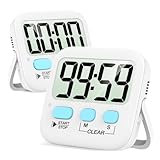
Digital Kitchen Timer: This type of timer focuses on simplicity and ease of use – it requires very little interaction from the user. It has a large digital screen so you can see the time clearly. The unit is usually battery operated, but some are also electric. The digital timer is the most compact and portable option, and it’s often found attached to appliances such as microwaves or ovens. Some varieties have a large LCD screen that shows an exact time count down for your convenience.
Because this timer is both built into appliances and purchased separately, they’re widely available around the world. Many people like this type of kitchen timer because they’re easy to use and very versatile. The only disadvantage is that you have to switch the appliance on when you want to turn it off, so some people find that the device tends to drain their batteries more quickly than they’d like.
Factors to Consider When Buying a Kitchen Timer:
The type of timer is one of the most important factors to consider when choosing a kitchen timer. The easiest and most cost-effective timers are those that are battery powered. However, there are other options for people who may be more comfortable with hands-on cooking or if you have a very large kitchen. There are also clip-on timers that attach to your pots and pans and can be placed anywhere on your stovetop or oven for easy monitoring.
But if you’re looking to save money and have a timer that can move around with you, the digital timer is a good choice. Just be sure to look for a timer that has a loud alarm and easy-to-read display. You’ll also want to make sure that the kitchen timer can be easily turned off by flipping a switch or pressing a button, so that you’re not left boiling your food for too long. If you’re using your kitchen timer in the microwave, make sure it’s waterproof enough to withstand the moisture, heat, and power of your microwave oven.
How to use a Kitchen Timer for BakingA kitchen timer is a handy tool for bakers and cake lovers. Baking requires precise time and temperature, and a timer can come in handy when cooking large quantities of food. It can also alert you when the food is done so you can start enjoying your meal. Here are some tips on using a kitchen timer when baking:
Keep an eye on what’s happening inside the oven, but don’t open it unless necessary : Opening the oven door affects cooking time because it releases heat, which reduces your cooking time. Keep an eye on your food as it cooks by looking through the glass doors of the oven to ensure that your food isn’t burning or drying out too quickly.
How to use a Kitchen Timer for Cooking
Cooking is another area where a kitchen timer can be very helpful. It can alert you when the food is done and help you avoid overcooking. Here are some helpful tips on using a kitchen timer for cooking:
Use your kitchen timer as a guide if following recipes : If you’re using a recipe with precise time estimates, use your kitchen timer to let you know when the food is done or needs more time in the oven.
Turn off the heat when necessary : If your recipe says that you need to turn off the stove after thirty minutes, be sure to do so as soon as it reaches that mark so your food doesn’t get overcooked.
Use a kitchen timer to let you know when the food is done : If you’re cooking something that requires sautéing or simmering, your kitchen timer can alert you when the food is ready to be served or needs a little more time.
How to use a Kitchen Timer for Grilling
A kitchen timer can be helpful when grilling because it can help you keep track of the time for your meal. Here are some helpful tips on how to use a kitchen timer for grilling:
Use the sound of the alarm to show how much time is left : If your recipe has a thirty-minute grilling time, but you’re unsure how much longer it will take, listen to the beep or buzzer on your kitchen timer; they’re very loud and should be enough for you to make sure that your food isn’t burning and dry.
Shut off the heat : You should shut off your grill’s heat source when your food is done so that it doesn’t overheat and burn.
How to use a Kitchen Timer for Deep Frying
Since deep frying is a very hot and messy process, you should use your timer to avoid overcooking:
Use the timer to shut off the heat : If your recipe requires turning off the heat after two minutes, be sure to do so at exactly two minutes.
Pull out and drain the food when it beeps : When your kitchen timer indicates that it’s time, move your food out of the oil and let it drain.
How to use a Kitchen Timer for Oven Baking (Baking on a Rack)
If you’re baking something that needs more time on a rack in an oven, using a kitchen timer is important. Here are some helpful tips for using a kitchen timer for oven baking:
Turn off the oven timer : The dial or button on the oven timer alerts you when it’s time to turn off the heat in your oven. When you hear this sound, you’ll need to let whatever is in the oven cool down before you can take it out.
Use your kitchen timer as a guide : If your recipe has a thirty-minute baking time and it may take longer than that, use your kitchen timer to tell you when the food is done. This will ensure that your food doesn’t overcook and burn.
Use the timer to let you know when it’s time to check on your food : Your food may be done at exactly thirty minutes, but if your recipe says it’s best to check at twenty minutes to make sure it’s not burning, use your kitchen timer as a guide.
How to use a Kitchen Timer for Grilling
If you’re grilling meat, it’s best to use a clip-on timer so you can keep an eye on the grill and prepare your other grilled foods. This way, you can avoid overcooking or undercooking your meat. It’s best to place the clip-on timer near the end of the grill or on a rod that attaches to your table, so that the food will be right in front of you while it cooks. If you don’t have such a rod, hang it from a small rod or hook underneath your grill hood.


Joseph F
Joseph is the founder of ChooseRight. An avid fan of internet marketing, on a mission to break down all the top products on the internet into easy top 5 lists. He's always on the lookout for new products and innovations.